Tuesday, March 1, 2011

Bad Blogger...

Hi, my name is Emily and I'm a really bad blogger. Seriously, I meant to post at least once a week and it's been three! I have been cooking but I've also been busy, and maybe a little lazy. I was going to post about some cinnamon bread I made that was a huge flop. It fell as soon as I took it out of the bread pan and it was not very good. I was embarrassed about my major fail and didn't want to share it with you. But I am anyway. I am trying to find a better cinnamon bread recipe and as soon as I do I will pass it along.


Last night I tried a new recipe from the Taste of Home Slow Cooker cookbook my mom got for me. I love my slow cooker but it feels like I cook the same things repeatedly. I made Pork Burritos and they were very good. Tonight we used the leftover pork for pulled pork sandwiches.


Pork Burritos (adapted from Taste of Home Slow Cooker Recipes)

1 boneless pork butt (3 to 4 lbs)
1 can (14.5 oz) diced tomatoes with chilies, undrained (I used a southwest style tomato with jalapeno, green chilies, and lime)
1/4 cup chili powder
3 Tbsp. minced garlic
2 Tbsp. lime juice
2 Tbsp. honey
1 jalapeno, seeded
1 tsp. salt

Cut pork roast in half and place in slow cooker
Combine remaining ingredients in blender and process until smooth. Pour mixture over pork. Cover and cook on low for 8-10 hours or until meat is tender.
Shred pork with two forks. Place shredded pork on large tortilla. Top with sour cream and avocado, if desired.

Tuesday, February 8, 2011

Macaroni and Tomatoes


Each family has their own comfort food. This is definately mine. As a kid, when mom was out for the evening and dad was cooking, this was a staple in the Dunnagan household. It’s super simple, super cheap, and super good. Toss a bag of macaroni in the pot. After draining and rinsing the mac add 1-2 cans of diced tomatoes. Done.


As I have gotten older and developed a taste for spicy things I've added 2 cans of rotel instead of tomatoes. I also add some cracked pepper and top it off with some shredded cheese. If you are a milk drinker like dad and myself, pour yourself a tall glass of goodness and take a seat.


1 bag of mac- $1.15ish
2 cans of tomatoes- $2.50ish.
Who can beat a meal to feed 2-4 under 4 dollars?

Apple Muffins and Surprises

Later today we (myself included) can read a guest post by my baby brother (he's 26, married and has a kid of his own, so I guess I can't really call him a baby) Zach.


I have no idea what he is posting about. All I know is that he made something, took pictures and asked if he could post on my blog. So I'll be as surprised as you are!

But before we do I wanted to share these apple muffins I made last week. I don't have a picture. I made them late one night so my son could take them to school for snack the next day and then the ones left were eaten in about 2 minutes. They were good! I'm always looking for muffin recipes since that is what I signed up to bring for school snacks for my boy. So about once a month I take them. I don't want to do the same things each time and I'd rather make them from scratch so that I know what goes into them and we can avoid any potential allergens. The recipe I finally settled on was from Taste of Home December/January 1995, p. 54. I've adapted the recipe because I didn't have everything it called for, and we were very happy with the results. Plus I got rave reviews from D's pre-K class!

Apple Muffins

1 cup butter
2 cups sugar
2 eggs
1 teaspoon vanilla extract
1 cup applesauce
1 large apple, diced
1/8 cup canola oil
4 cups all-purpose flour
1 teaspoon baking soda
1 teaspoon ground cinnamon
1/4 teaspoon ground cloves
1/4 teaspoon ground nutmeg
1/8 teaspoon ground ginger

Cream butter and sugar with electric mixer. Add eggs and vanilla, mix well. Stir in applesauce and oil. Combine dry ingredients and stir into creamed mixture. Fold in apples.

Fill muffin paper-lined muffin cups three-fourths full. Bake at 350 degrees for 20 to 25 minutes or until a toothpick comes out clean. Cool for 5 minutes before removing from pans to wire racks. Makes about 2 dozen muffins.

*You can also make this into bread. Fill bread pans 3/4 full and bake at 350 for approximately 45 minutes to 1 hour or until toothpick comes out clean. (I did make a couple of small bread loaves with this. It took about 35-40 minutes to bake for the small loaves.)

Wednesday, February 2, 2011

Chicken and Dumplings


Actually around here we call it "Chicken and Ducklings." The first time I made these the boys had asked what I was making and I told them "Chicken and Dumplings" but they heard "ducklings." So that is what they call them.

It's cold here. Really cold. We had a blizzard and about 11 inches of snow so we've been inside and I've been making all sorts of warm, comfort foods and drinking hot chocolate. I thought last night would be a good night for Chicken and Dumplings.

Chicken and Dumplings are a pretty controversial meal. (Well, actually just the dumplings). Flat, noodle- dumplings or large biscuit-like dumplings. I'm not sure which is the best (I've only had the flat ones). In fact, I had never had them until I met my man. His great grandmother made them. I had only been to her house a couple of times before she passed away and both times she had chicken and dumplings on the stove. If she knew someone was coming then she had it cooking. She passed away last year and the family handed out the recipe at her funeral. So it has become a winter staple in our house. The boys actually eat it and my man loves it, so this is a good thing!


Here is the recipe, adapted from my man's great grandmother.

Chicken and Dumplings

Whole Chicken (about 3 lbs)
1 large egg
1/8 cup water
1/2 tsp. salt
1 cup flour
1 Tbsp. butter
1/2 cup evaporated milk

Boil the chicken in a large pot for one hour. Take the chicken out and keep the broth simmering on the stove. Pick the chicken from the bone.
Beat egg, water and salt. Mix in 1 cup of flour. Knead dough and roll out on flour covered board until thin. Cut into strips, tear apart and put in broth. Add butter, evaporated milk, chicken and salt and pepper. Let simmer until dumplings are cooked through (they should float to the top of the broth once they are cooked). Enjoy!

Tuesday, January 25, 2011

Tortillas!


We love mexican food in our house. Even the boys love it. My middle boy would eat chips and salsa for every meal and be happy (he has actually asked if he could do that, we said no). About 6 months ago my husband decided he was going to make tortillas. So he watched a few youtube videos and found a recipe and started making them. Making tortillas is something we can all do together. The boys love rolling the dough into balls (and sneaking a fresh tortilla).

Homemade Tortillas

3 1/2 cups all purpose flour
1 tsp. salt
1/2 tsp. baking powder
3.5 oz. shortening or 7 Tbsp. vegetable oil
1 cup warm water

Mix dry ingredients together. Cut in shortening (or stir in oil). Stir in warm water slowly. Once the ingredients are coming together take it out and place it on a lightly floured board and knead the dough until smooth (about 5 minutes). Cover the dough and let rest in warm place for 15 minutes. After the rest, roll the dough into small balls. (I use a food scale to make sure they are all the same size. I measure out 1.5 ounces per ball and can make approximately 20 small tortillas). Keep the balls covered.

Heat a skillet or griddle on medium heat.

Place a ball on floured surface and press with palm of hand to flatten.


Roll out with a rolling pin.


Turn a quarter of a turn and roll again. This will help achieve the round shape. (Don't worry, they still taste good even if they look funny!)


Once the dough is very thin place it on your hot skillet.


When it starts bubbling, flip the tortilla over and press it down with a spatula and cook for a minute until the second side is starting to brown.


Place in tortilla warmer or on a plate covered with towel to keep them fresh. If you are not using these right away, you can wrap the tortillas in foil and place them in the refrigerator. When you are ready to use them, you can heat up a few at a time in the microwave or heat them in a warm oven until warm.

Friday, January 21, 2011

Cooking with Food Allergies

About three and a half years ago we found out that our oldest son was severely allergic to tree nuts. Then a few months later we found out he was also allergic to beans (legumes). A year after his first initial diagnosis we discovered he was also allergic to eggs. It was hard dealing with his allergies at first. Constantly having to check labels and making sure that everyone he was around knew he had these allergies. But cooking with food allergies is also difficult. A lot of foods are processed with tree nuts or "may contain nuts." In the last year it has become much easier. He is old enough to know what he can and cannot have and also able to tell others or ask what is in something. We've learned that he can have eggs cooked in something (which makes cooking so much easier), and that we can have beans and cornbread and he gets a special meal that night. I thought we were really on the upside of this allergy battle until yesterday. Since my baby turned one I thought "this would be a great time to give him a peanut butter sandwich." After about 5 small bites he starting breaking out in hives and coughing and then his eyes, lips and tongue started swelling. I quickly gave him benadryl and we went to the closest urgent care. After a couple of hours of observation, a steroid shot and puking all over mommy, he was much better. But now we have a peanut allergy too. A "life threatening, keep your epi-pen handy" peanut allergy. Since this one is new to us, I started looking at what we have in our cabinets. I knew a lot of things were processed with peanuts but didn't realize how much until now. When I called the pediatrician today they named things to watch for with peanut allergies, "pizza, pizza sauce, bbq sauce, cookies, crackers, and everything that is cooked in peanut oil, etc..." I am just glad I enjoy cooking and baking. I can control what goes in my food and how safe food is for my children.

Monday, January 17, 2011

Pizza Pockets


Maybe we could call these 'Mini Pepperoni Calzones' instead. That's really what they are. But my boys wanted to call them 'Pizza Pockets' so that is what I'll call them. These were very simply and tasty. I haven't had a frozen one yet, but I imagine they will be good too.

I used one recipe of my pizza crust (and did half whole wheat flour, half bread flour). After letting the dough rest I rolled it out and cut it with a large round biscuit cutter (about 4"). Then rolled each circle out a little more (to about 5-6 inches in diameter). On each circle I put a teaspoon of pizza sauce, pepperoni and shredded cheese. Then fold the circle in half and pinch the edges to seal. Place each of the pizza pockets on baking sheets and bake at 425 degrees for 12 minutes. You could put a variety of pizza toppings in your pizza pocket. One recipe made about 2 dozen pizza pockets.

Sunday, January 16, 2011

This week

I am trying out a few new things this week. I'm making this egg salad sandwich for my man. I hope he likes it because I'm not really an egg salad fan. This is what true love is really about, making things that smell for the people you love!

I'm also making beef stew. The boys really liked the crescent dogs and ham and cheese crescents I made a couple of weeks ago, so I'll be making those again for lunches. As well as the pizza pockets I mentioned a couple of weeks ago. I never made them, so I'm going to try again. I'm also making chili with homemade bread bowls. I've never made bread bowls from scratch, so I've got to figure something out. I'll post about it when I do.

Most importantly, I'm making pizza. Not that pizza is really that special, but the occasion for the pizza is.


My baby boy is turning one! And he LOVES pizza (at least it's the only food besides bananas that he doesn't throw, so we think he loves pizza). It's hard to believe that almost a year ago our family was blessed with the addition of a beautiful baby boy. The last year has been never boring.


My baby is always happy. He loves to smile and play with his big brothers. He taught us that even though he's our third child, he will NOT be just like his brothers. He's thrown us through a few loops this year. But he is healthy and growing and we are continually blessed.


So happy birthday to my sweet baby boy, and yes, you'll always be my baby!

Friday, January 14, 2011

Handmade Pasta

If you've never made handmade pasta, you should! I made it tonight for supper with spaghetti sauce. It was pretty easy, but a little hard to roll out. It's difficult to get the dough really thin without a pasta maker (which I don't have) so I just rolled it with a rolling pin. It turned out quite thick since it plumps up a bit after cooking. But I will definitely be making it again.


My friend Sommer, who loves all things Italian, shared this recipe with me.

Michael Chiarello's Handmade Pasta

2 1/2 cups all-purpose flour
1 tsp. kosher salt
6 egg yolks
2 Tbsp. olive oil
4 to 6 Tbsp. water

1. On a large work surface, heap flour into a mound; make a well in the center and sprinkle with salt. Put egg yolk and oil into well. With fingertips mix yolk mixture into flour. Sprinkle with water and mix until it forms a ball. Knead until dough feels smooth (it will look bumpy but will feel smooth), about 10 minutes. Flatten dough into a disk; wrap in plastic wrap. Chill 20 minutes.
2. On a lightly floured surface, roll dough into a 1/16-inch-thick circle. (If it's difficult to roll, cover and let rest 10 minutes). Dust top of pasta circle lightly with flour. Roll up pasta circle, jelly-roll style. Cut crosswise into 1/4-inch strips. Unroll and separate strips. Let stand about 5 minutes to dry slightly.
3. To cook, drop pasta into a larger pot of boiling salted water. Cook until tender, 5 to 8 minutes. Drain well. Makes 4-6 servings.

Wednesday, January 12, 2011

Food blogs

This week I haven't been cooking, at all. We've had leftover roast and potatoes and then last night I was planning on making a roasted chicken and then use the leftover chicken to make enchiladas, but we had family visiting and met them at a restaurant. Actually, I was a little relieved to not be cooking.

Monday night I made an apple pie (that I had originally planned on making Saturday but ran out of time), and the pie spilled over in the oven (which I had planned for, but for some reason it ran off of my oven liner to the bottom of the oven. Then our house was filled with smoke. So we had all of the doors and windows open to air out the house (did I mention is was REALLY cold and our house got down to 57 degrees). After we got our house aired out and ate our pie, I decided I better clean the oven. I kept smelling something but just figured it was the baking soda and vinegar I cleaned the oven with. The next morning my man left early for work and when I got up I still smelled something. I took my biggest boy to school and came back home and had a horrible headache (I thought it was from not having my coffee soon enough after I woke up, so I had 3 cups!). Then I started to think it might smell like gas. So I went to pick up D from school and called a good friend and neighbor and asked if he could go by and check the house. Shortly after he called me back and said that it did smell like gas and I had left one of my burners on and it was leaking out gas. I felt like an idiot for not even thinking about that, but was thankful that he came to check. So we spent the next couple of hours bundled up so we could air the house out once again. Needless to say, I was glad to not have to cook last night.

Tonight we had leftovers from last night, but tomorrow I AM cooking. I think I'm going to make my roasted chicken and roasted sweet potatoes and maybe dinner rolls.

I was thinking about food blogs and how much they inspire my cooking and baking choices. I am thankful that I live in a time where we have all of this available to us. My mom and grandma had to be much more creative in their menus. Or at least I imagine they were (I haven't really asked them). It's nice to just go to the blogs I read most often and see what they've been cooking and find inspiration there.

Here are a few of my favorite food blogs:
Joy The Baker: you definitely have to check out these frozen cookie dough balls.

My friend Holly introduced me to Steamy Kitchen and her Perfect French Bread recipe. I bake this bread at least 3 times a month.

Of course I can always find something to make on The Pioneer Woman or her Tasty Kitchen site.

I told you about Heavenly Homemakers last week. I also like Money Saving Mom. She puts her weeks menu on her website.

So what are your favorite food blogs? Where do you find your cooking inspiration?

I'll be back later this week with some recipes and hopefully proof that I didn't burn my house down!

Monday, January 10, 2011

Bread


I really like bread. Before my man and I got married I decided to do the no-carb diet to lose a few extra pounds before our wedding. When I went for my final dress fitting, my dress was too big. Like 2 sizes too big.


I got my dress fixed and our wedding went off without a hitch. But after that I decided carbs are too good to go without. But it wasn't until a couple of years ago that I actually started making my own bread. I was very afraid of using yeast in my cooking. I'm not sure why. In fact I found yeast that had been expired for 2 years in my pantry. Now I buy a jar of yeast at least once a month. I really enjoy making all kinds of bread.

I've had the Williams-Sonoma Bread book for about 5 years. And until this weekend I've only made one thing out of it, blueberry muffins. (They were really good, but it was right before I found out I was pregnant with my first child and was not feeling well.) Anyway, this book is where I got my bagel and dinner roll recipes that I made Saturday. The dinner rolls were so simple. I make french bread once a week but thought making dinner rolls would take too long so I've never done it. But I'm glad I did and I'll definitely be doing it again. These rolls were so soft and moist. They are still good today (2 days later!).

Dinner Rolls (Williams-Sonoma BREAD)

3 1/2 tsp. active dry yeast
pinch of sugar
1/3 cup warm water
1 cup buttermilk* at room temperature
1/4 cup sugar or 1/4 cup honey
1/2 cup unsalted butter
2 large eggs, slightly beaten
1 tsp. salt
4 1/2 - 5 cups all-purpose flour, plus extra as needed
Canola oil for greasing.

In a bowl, sprinkle the yeast and sugar over the warm water and stir to dissolve. Let stand until foamy, about 10 minutes.
In a heavy-duty mixer fitted with the paddle attachment, combine the buttermilk, sugar, melted butter, eggs, salt and 1 cup of the flour. Beat on medium-low speed until creamy, about 2 minutes. Add the yeast mixture and 1 cup of the flour,a dn beat for another minute. Beat in the remaining flour, 1/2 cup at a time, until the dough pulls away from the bowl sides.
Switch to the dough hook, Knead on low speed, adding flour 1 Tablespoon at a time if the dough sticks, until a very soft dough forms, about 1 minute. The dough should be softer than typical bread dough, yet smooth and springy.
Transfer the dough to an oiled deep bowl and turn the dough once to coat it. Cover loosely with plastic wrap and let rise at room temperature until doubled in bulk, about 1 1/2 hours.

Grease two 8-inch round cake pans. Turn the dough out onto a lightly floured board. Divide the dough in half and roll each half between your palms into a rope 18 inches long. Cut each rope into eighteen 1-inch pieces. Shape each piece into a ball, and place the balls, sides touching, in the prepared pans. Cover loosely with plastic aNd let rise at room temperature until puffy, 30-45 minutes.

Preheat oven to 375*F. Bake the rolls until light golden brown, 18-23. Let cool slightly in the pans or transfer to a rack. Serve warm.

Makes 36 rolls.

*If you don't have buttermilk, put just under 1 cup non-fat milk and 1-2 Tablespoons white vinegar in a bowl or glass. Let it set for about 5 minutes, or until curdled.

Saturday, January 8, 2011

Today

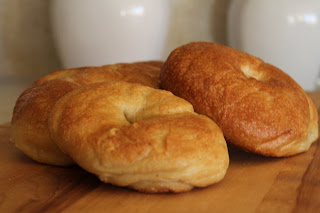
Last night before we went to bed we started our bagels so we wouldn't have to wait for them to rise when we woke up. So we had this for breakfast:


Then we dropped the boys off at the Y and went for a run. It was good, but after bootcamp yesterday and the run today I can barely move. In fact I was a little afraid to sit down to post tonight! After we got home I started making this for supper. If you haven't had PW's Pot Roast, you need to.

Then, my day just got better. I got to see this girl and her brothers (but the boys move too fast to get a good picture):


Then I made some dinner rolls. (Here's a pic of what's left over. A full pan was gone!)


Then I made potatoes. If you like butter and potatoes this recipe is for you! And they made my baby VERY happy!


Now, it's 9:00, my kitchen is clean and I am ready for bed! And I am NOT cooking tomorrow. But I will share my pizza crust recipe that I promised earlier this week. I used it for last nights muffuletta calzones (which were really good!).

Pizza Crust (adapted from the back of a Hodgson Mill Whole Wheat flour bag)

1 package active dry yeast
1 cup warm water
3 cups bread flour (or you can use 1 1/2 cups whole wheat and 1 1/2 white or bread flour)
2 tsp granulated sugar
1/2 tsp. salt
2 Tbsp. olive oil

Dissolve the yeast in warm water. Allow to rest 5 minutes. Stir in 2 1/2 cups flour (if using whole wheat and white stir in 1 1/2 cups whole wheat flour and 1 cup of white flour). Knead in remaining flour by hand, about 5 minutes. (The longer you knead the softer and chewier the crust will be). Spray a medium-sized bowl with cooking spray. Place dough in bowl and turn to coat thoroughly. Cover and allow to rise in warm place 15 minutes. Stretch pizza crust to fit pan (you may make two pizza if using smaller pans). At this point I pre-bake my crust at 425 for 7-10 minutes, then top with desired toppings. Then bake until cheese is melted and crust is brown.

Thursday, January 6, 2011

Leftovers, old favorites and new things

Last night we had leftovers. We usually have leftovers once a week. Wednesdays are good days for leftovers. We have church and it makes it a little easier to just have leftovers before we run out the door.

Tonight we had beans and cornbread... minus the cornbread. I forgot to buy milk and we were out so we just had beans tonight. All my boys asked where the cornbread was. The beans were good though. I added a little salsa and that was really good.

But I'm really excited about tomorrow night. I am making Muffuletta calzones. I've never made them before. I found the recipe in Southern Living's April 2008 magazine (page 148). Here's the recipe. I'll try and add pictures tomorrow after I make it.

Muffuletta Calzones

2 Tbsp. olive oil, divided
1 cup jarred mixed pickled vegetables, rinsed and finely chopped
1 (7oz) package shredded provolone-Italian cheese blend
8 thin slices Genoa salami, chopped (about 1/8 lb.)
1/2 cup diced cooked ham
1/4 cup sliced pimento-stuffed Spanish olives
1 lb. bakery pizza dough (I will make my pizza dough)
2 Tbsp. grated Parmesan cheese

1. Preheat oven to 425. Stir together 1 Tbsp olive oil, pickled vegetables and next 4 ingredients.
2. Place dough on a lightly floured surface. Cut dough into 4 equal pieces. Roll each piece into a 7-inch circle.
3. Place 2 dough circles on a lightly greased baking sheet. Spoon vegetable mixture evenly on top of circles, mounding mixture on dough and leaving a 1-inch border. Moisten edges of dough with water, and top with remaining 2 dough circles. Press and crimp edges to seal. Cut small slits on tops to allow steam to escape. Brush with remaining 1 Tbsp. olive oil, and sprinkle with parmesan cheese.
4. Bake at 425 for 20 to 24 minutes or until golden brown.

Update: The Muffuletta Calzones were GOOD. Definitely going on my "make again" list.

Tuesday, January 4, 2011

Corn Dogs and Crock-Pots!

Those two things actually have nothing to do with each other. I did make these corn dog muffins today.


They were alright. Not my favorite thing I've made. I got busy and forgot to set the timer and I think I overcooked them a bit. They were too dry. My boys didn't eat the cornbread, they just dug out the hot dogs and ate them. The baby liked the cornbread though. I stuck a few in the freezer just because they were left over, and I hate throwing food away.

I got to use my new crock-pot today! I got it for Christmas. I've been needing a new one for at least 5 years. My old one was recalled and I never replaced it, so I was happy to get a new one from my mother-in-law for Christmas. It worked wonderfully. I made my crock-pot spaghetti sauce. It is so easy. I make it at least once a month. I never buy jarred sauce anymore. And my picky little eaters love it! I've made it a variety of ways (with meat, meatless, for lasagna). The possibilities are endless! I forgot to take a picture of it when it was finished but here is a picture of all the ingredients.


Crock-pot Spaghetti Sauce

1 lb hamburger (or Italian sausage)
1 Onion, diced
2 cloves of garlic, minced
32 oz tomato sauce
12 oz tomato paste
1 can diced tomatoes
1 cup red wine
1 teaspoon Italian seasoning
1/2 cup dry parsley
1 Tablespoon salt
1 Tablespoon sugar
1/2 teaspoon black pepper

Brown the hamburger, onion and garlic until hamburger is cooked. Place all ingredients in crock-pot and simmer all day.
(To make it meatless, I cook the onion and garlic in a skillet with olive oil, then add all ingredients to the crock-pot). I can usually get at least 2 meals out of this sauce. If I am making lasagna I usually double the recipe and make 2 or 3 small lasagnas with the sauce and then I have enough to have pasta a couple of times as well.

Monday, January 3, 2011

Crescents!

I spent the better part of my day making crescent rolls (and doing laundry). I've only made them once before and tonight we were having ham and cheese crescents and tomato soup (which I forgot to get at the store, so we just had the crescents) for supper. I've made ham and cheese crescents before with canned crescent rolls and I have to say these were so much better. It was definitely worth the extra time.


I decided to make some crescent dogs too for my boys to eat for lunch.


Then I ran out of stuff to put in them so I just made plain crescents.

I think I'll have one for breakfast tomorrow with my coffee.

A friend gave me this recipe several years ago. This recipe is adapted from Great American Home Baking. I doubled the recipe so that I would have enough for supper tonight and plenty to freeze for lunches.


Butter Crescents

1/2 cup milk
1/2 cup butter,softened
1/3 cup granulated sugar
1/2 tsp. salt
1 package active dry yeast
1/2 cup warm water
1 large egg, lightly beaten
3 1/2 to 4 cups all-purpose flour

glaze
1 large egg, lightly beaten (I forgot to put this on. They would have been much prettier with it!)

1. In a saucepan, heat milk until bubbles appear around edges of pan. Combine butter, sugar, and salt. Add hot milk; stir well. Cool to lukewarm.
2. In a small bowl, dissolve yeast in warm water. Let stand until foamy, 5-10 minutes.
3. Beat yeast mixture and egg into milk mixture at low speed. Beat in 2 cups of flour at low speed until smooth. COntinue beating until thick. Mix enough remaining flour until dough pulls away from sides of bowl.
4. On a floured surface, knead dough very gently until smooth and elastic, 2 to 3 minutes. Place in a large greased bowl, turning to coat. Cover loosely with a damp cloth; let rise in a warm place until doubled, 1 hour.
5. Punch down dough. On a floured surface, divide dough in half. Cover with a damp cloth; let rest for 10 minutes.
6. Grease 2 baking sheets. Using a floured rolling pin, roll 1 dough half into a 12-inch circle. Cut circle into 6 wedges. Starting at side opposite point, roll up each wedge. Place, point side down, on prepared baking sheets. Cure ends to form crescents. 7. Repeat with remaining dough half.
8. Cover loosely with a damp cloth; let rise in warm place until almost doubled, 30 minutes.
Preheat oven to 400. Brush crescents with glaze. Bake until golden, 15 minutes. Transfer to a wire rack to cool.

To make Ham and Cheese Crescents (or crescent dogs) follow recipe until you are ready to roll up the crescents. Place thinly sliced deli ham (or cut hot dogs) and cheese (I used shredded cheddar) on the dough. Then roll from the each into a wedge. I increased the baking time by a few extra minutes.

Once they cool you can place them in freezer bags and put them in the freezer (If there's any left!). Then reheat them in the microwave for a quick meal.

Sunday, January 2, 2011

Bierocks


If you've never had bierocks, then you NEED to make these. Beirocks are hamburger and cabbage filled bread pockets (or my boys call them pillows). They are German and perfect. Try them today!

Beirocks: a Recipe from my Mom

2 cups scalded milk
4 Tablespoons sugar
4 Tablespoons shortening
2 teaspoons salt
2 packages of yeast
1/2 cup warm water
2 eggs, beaten
7 cups of flour

Filling:
2 lbs. hamburger
2 lbs. cabbage, shredded
2 medium onions, chopped
Salt and pepper to taste
1/4 - 1/2 teaspoon allspice

Combine milk, sugar, shortening and salt; cool to lukewarm. Add yeast, dissolved in water. Add eggs. Stir in flour, knead and cover. Let rise until doubl ein bulk. While dough is rising, cook in hamburger, cabbage and onions in large skillet or dutch oven. Add salt, pepper and all spice. Cook until done. Roll dough 1/4 inch thick and cut into 4" squares. Use 2-3 Tablespoons filling and put in the center of each square. Fold corners to center, pinching together at the top. PLace on cookie sheet; let rise about 10 minutes then bake at 425 until golden brown. Brush with melted butter. These freeze nicely. Makes approximately 2 dozen.

Note: If you freeze these, you can reheat them in the microwave for about a minute and a half.

"I don't like sandwiches"


Well, I like sandwiches. Most people do. But my three year old, who used to be a great eater, has become picky. He refuses to eat sandwiches. We have sandwiches a lot for lunch. They are cheap, good and fast. I've tried giving him sandwiches thinking he would get over it. He has gone days without eating lunch (or eating just a piece of fruit). So I decided to start changing up our lunch routine. I decided to plan for three meals a day (I'm actually copying my friend Amanda). I'm sure this is not a new thing for everybody but it is new for me. It's nice. I have a calendar on the fridge and everyone can see what they are eating for each meal of every day. This time I am trying a few new things. I've recently discovered Heavenly Homemakers (thanks again to my friend Amanda). She has a lot of recipes available on her blog. Be sure to check it out! I'm trying four of her recipes: corn dog muffins, pizza pockets, and homemade poptarts, and breakfast burritos. We made the poptarts yesterday. They are good. We have our own tortilla recipe that we used for the breakfast burritos. No month would be complete without PW's cinnamon rolls. The rest of our breakfasts will consist of cereal, oatmeal, pancakes (I'll share my favorite recipe later), and we are going to try and make our own bagels. I'll let you know how they turn out. For lunches we'll add in some peanut and jelly sandwiches (except for my middle man of course!), some boxed macaroni and cheese (it was on sale), ham and cheese crescent rolls, and bierocks (recipe coming soon!). I'll save our dinner menu for the next post.

New Year, New Blog

In an effort to become more organized, I've decided to start a blog. Well, actually my man told me to start a blog so I could remember what recipes I've tried and liked when I get in a cooking rut. Which has been a lot lately. I'm tired. I have three boys, 5 and under. That explains the tired. I'm a stay at home mom. I love spending time with my man and boys, cooking, knitting and shopping (especially when I find great deals).
I plan on posting when I try new recipes. I'll also share some of my current favorite recipes and my favorite cooking blogs. Most of what I cook is easy, family friendly and budget friendly.
Feel free to leave comments or suggestions.